Quick Start
- Install the Rivet Unity plugin
- Set up your Unity project
- Deploy your game to Rivet servers
Overview
The Rivet Unity plugin allows you to get a multiplayer game running quickly with Fish-Net networking, without complex setup. You can test locally and deploy to scalable cloud servers across multiple regions, all managed through the Unity editor.
Prerequisite
- Unity 2020.3 or newer
- Linux Dedicated Server build module
- Dedicated Server build module for your development platform
- Docker installed on your system
Detailed Steps
1. Set up the Rivet Unity plugin
- Open the Package Manager in Unity
- Click the
+button in the top left - Select "Add package from git URL"
- Enter
https://github.com/rivet-gg/plugin-unity.git?path=Assets/Rivet - Click "Add"
2. Access the Plugin
- Open the Rivet plugin window by going to
Window > Rivet > Rivet - You can dock this window within your Unity editor layout for easier access
3. Configure Your Project
-
Sign In:
- Click the "Sign In" button in the plugin
- Follow the steps to create an account or sign in
- Select your game project through the Rivet hub
-
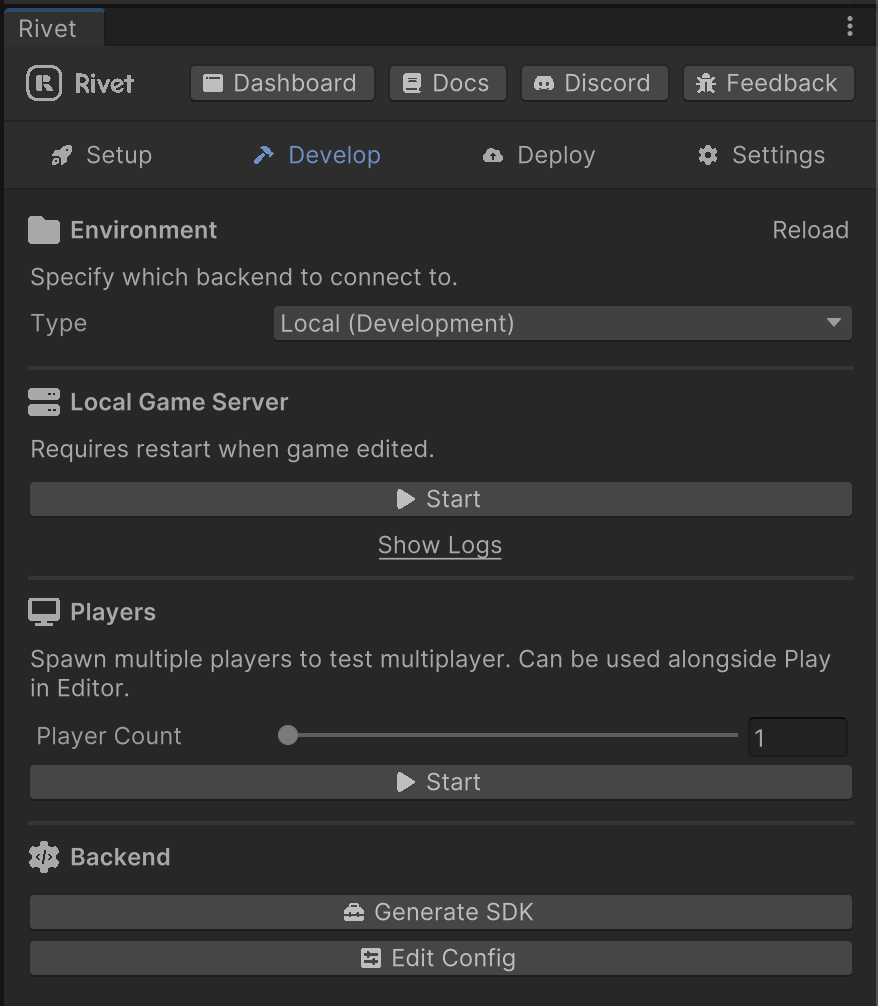
Plugin Navigation: The plugin interface contains several key tabs:
- Develop Tab: Main development workspace
- Start local Unity servers
- Configure testing settings
- Manage development environment

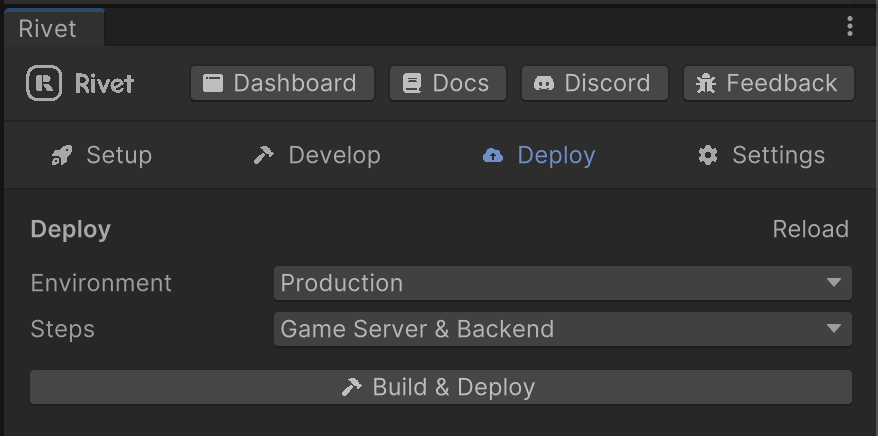
- Deploy Tab: Handle deployment tasks
- Build containerized game servers
- Deploy to Rivet cloud infrastructure
- Monitor deployment status

- Develop Tab: Main development workspace
Advance Networking Details
- This template uses Fish-Net for networking (documentation)
- Currently configured for UDP sockets using the Tugboat transport
- Note: WebGL builds require the Bayou transport (not included in current demo)
Testing Your Game
-
Use the Develop tab to:
- Start local server instances
- Test multiplayer functionality
- Configure development settings
-
Local Testing Options:
- Run multiple clients
- Test different network conditions
- Debug server behavior
Deployment
-
In the Deploy tab:
- Build your server container
- Select deployment target (Production/Staging)
- Configure deployment settings
- Monitor deployment progress
-
Post-Deployment:
- Test the deployed version
- Monitor server performance
- Scale as needed
Troubleshooting
- Verify Docker is properly installed and running
- Check Unity version compatibility
- Ensure all required build modules are installed
- Review logs in the Unity console and Rivet plugin
- Confirm network connectivity for cloud deployments
Next Steps
- Customize the Fish-Net networking setup
- Add game-specific server logic
- Implement additional Rivet features
- Join the Rivet Discord for support
For more detailed information, visit the Rivet Unity Plugin GitHub repository.